AI: Is it art? Choose Your Fighter

AI: Is it art? Choose Your Fighter

In my last video I said I had a topic. And this little something is about a topic I’ve wanted to talk about for a while. AI. Artificial Intelligence. 


You’d think they could have named it better, right? If you need a qualifier to the word “intelligence” it seems like it might not be a good thing. But I digress.

For months now I’ve participated in countless discussions about AI. Some with those vehemently opposed. Others who are AI-curious. Each person with justifiable positions on AI. I can see all of it, and have pondered how it fits in with my own perspective on what makes something an “art” piece.
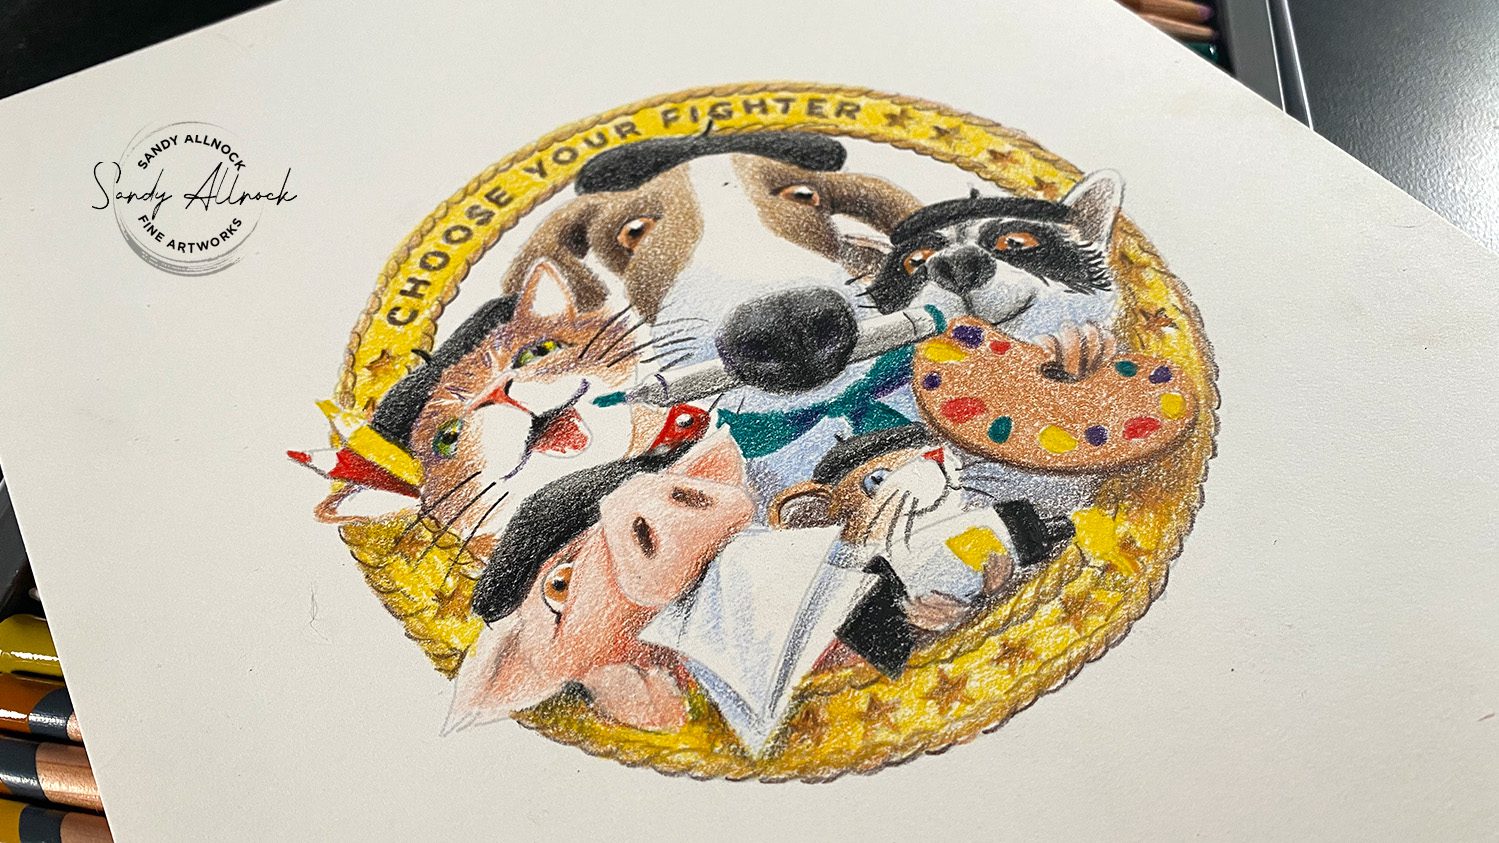


AI is by no means new right now. It’s fall 2024, and it’s been taking the world by storm. It seems I run into it in every aspect of life, expecially on the web – every plugin, every website, every search engine – it’s all powered by AI. All the first Google suggestions are AI compilations from what it THINKS is the best answer. (I scroll past that to get the REAL answer to my questions!)

And with customer service turning increasingly to AI to respond to us, the world is feeling less in-touch, less human, by the day. Very depressing! I can promise you that on my blog, in my newsletters, on my Art-Classes site – there’s nothing you should run into that’s AI-powered. If you get an email back from me, it’s going to be me writing it. (Thus the typos!) My newsletters could be AI generated – but I’m refusing to click that button. 

And with AI trying to get into art…well, it’s about time I put some thought into what *I* think about it. I’ve had many a discussion with other artists, and find all sorts of opinions, though most are worried about where it’s headed. Visual models are based on the art of people who were never given an opportunity to opt out – no one whose art is utilized gets a penny from usage of their work, and there’s no credit given.

So I’ve put my thoughts into a video while creating a cute piece of art – and would love to know YOUR thoughts on AI after you watch. What’s your experience been?

Video: Is AI art? Choose Your Fighter

Watch the video below and scroll to the end to leave comments or questions — or click HERE to watch it on YouTube and leave comments over there. I read both dutifully!

SUPPLIES

Some product may be provided by manufacturers for review and use. Compensated affiliate links are here at no cost to you. I appreciate your support of my work with your purchases! Full affiliate and product disclosure | My trusted partners in art

Black and white original drawing:

    1. TWSBI Eco fountain pen medium nib 
    2. Hahnemule Hand lettering pads
    3. Platinum Carbon Fountain Pen Ink

Color drawing, printed in a tint:

    1. Legion Stonehenge Drawing Paper, 9×12 pad
    2. Derwent Lightfast Colored Pencils (12pencil set used here)
    3. Dahle Dual-hole sharpener

Subscribe to receive blog posts by email:

Pen and ink drawing

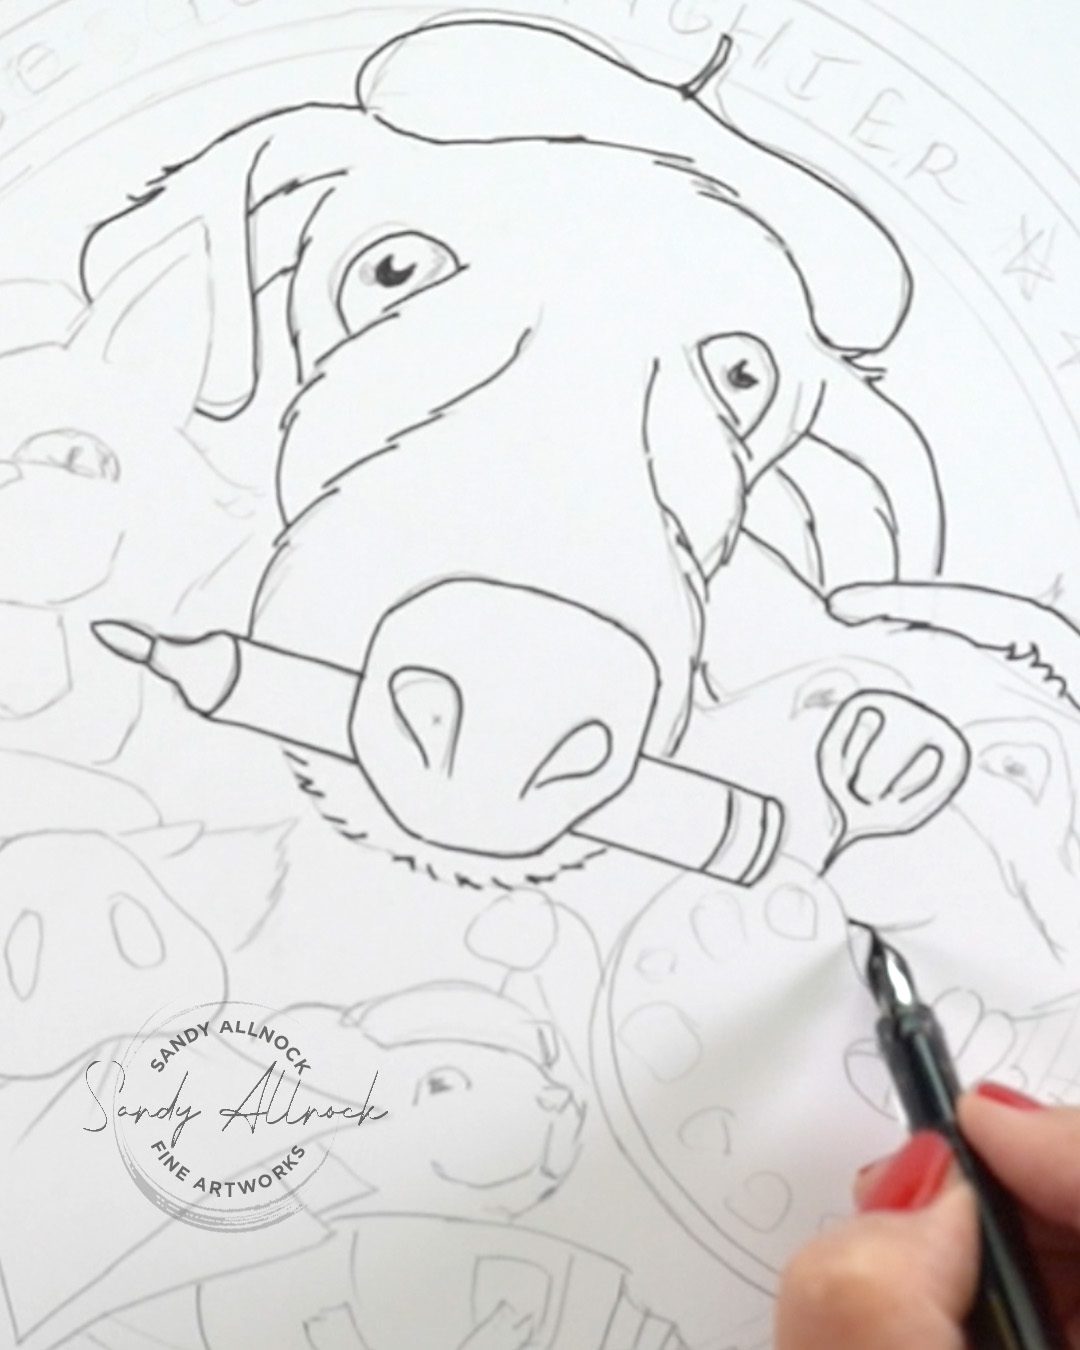
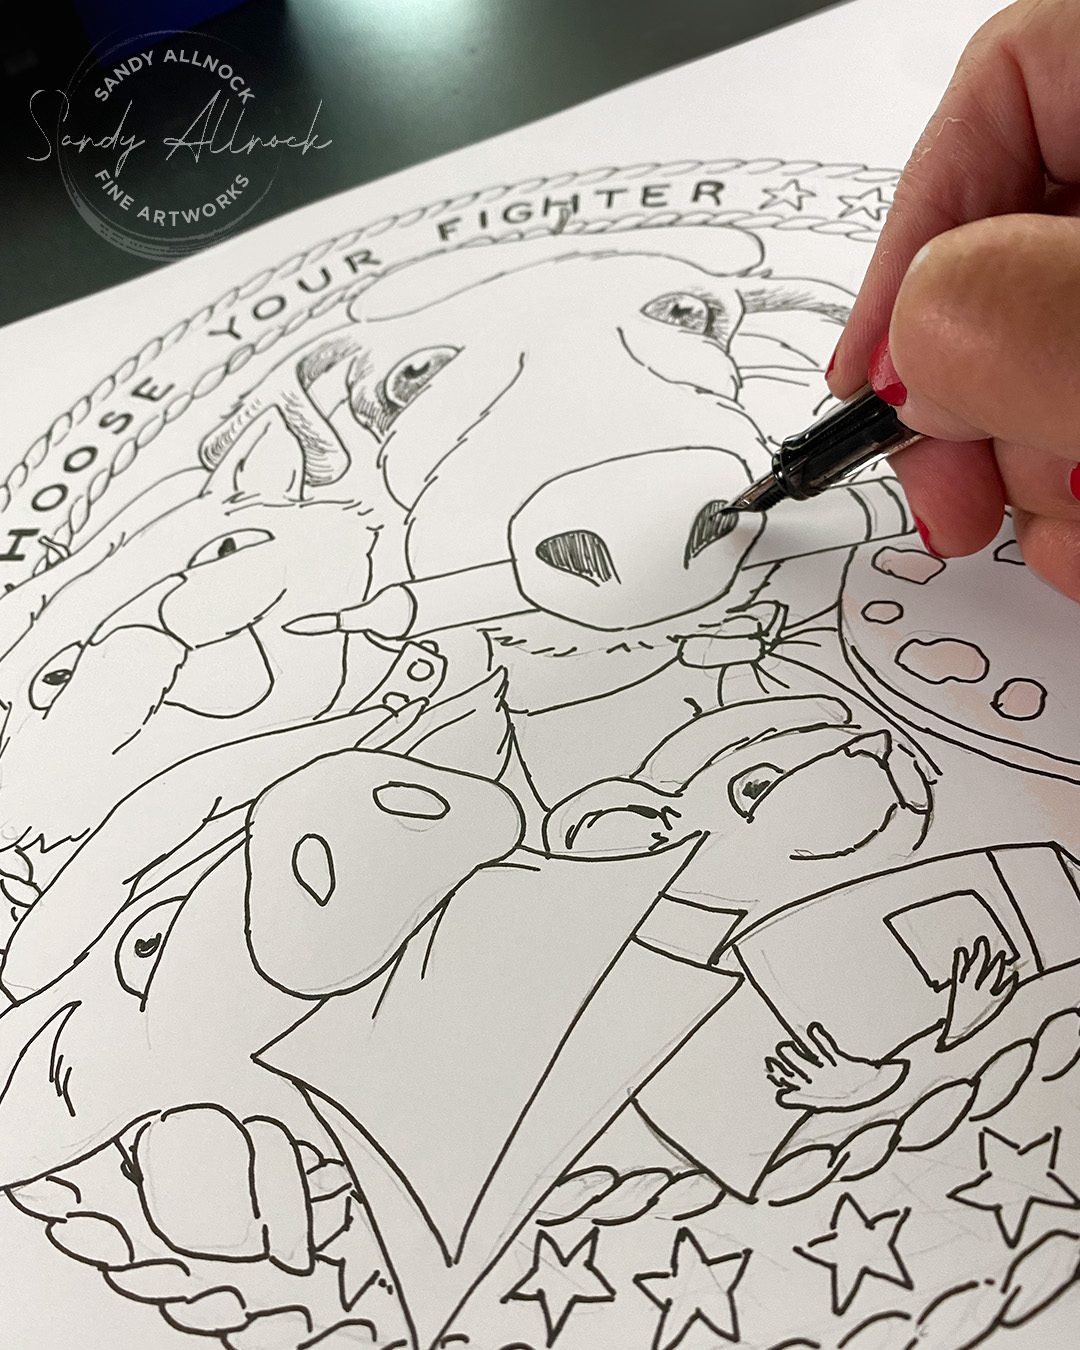
After a relatively detailed sketch of the shapes, I dove in with my Eco Twsbi (medium nib) Eeep! It’s been a while and I’m out of pen and ink practice. Inktober’s coming up, I need to get back my skillz.

Then the pen and ink drawing…the Hahnemule lettering paper does the least feathering, so when I’m going to create something that might end up as a printable, I use this to be sure I get the best lines with the least fraying.

The pen did a nice job of it since I was working so large; it’s always hard to tell what thickness will shrink down well. I’d recommend not making this an A2 card size, it’s got a lot of small bits! Originally I had planned to add a lot of crosshatching and shading in pen and ink – but I wrecked it in that phase so totally that I was VERY glad I captured the drawing before I added all of that so I could both shrink it down for me to color and still offer it to you. 

Another note: I had originally hand-lettered the text. But not only did it end up not centered, it just looked a mess! So using graphics programs I replaced it with real text, and centered it up. #graphicdesignnerd !!!
 

Derwent Lightfast, 12 color set

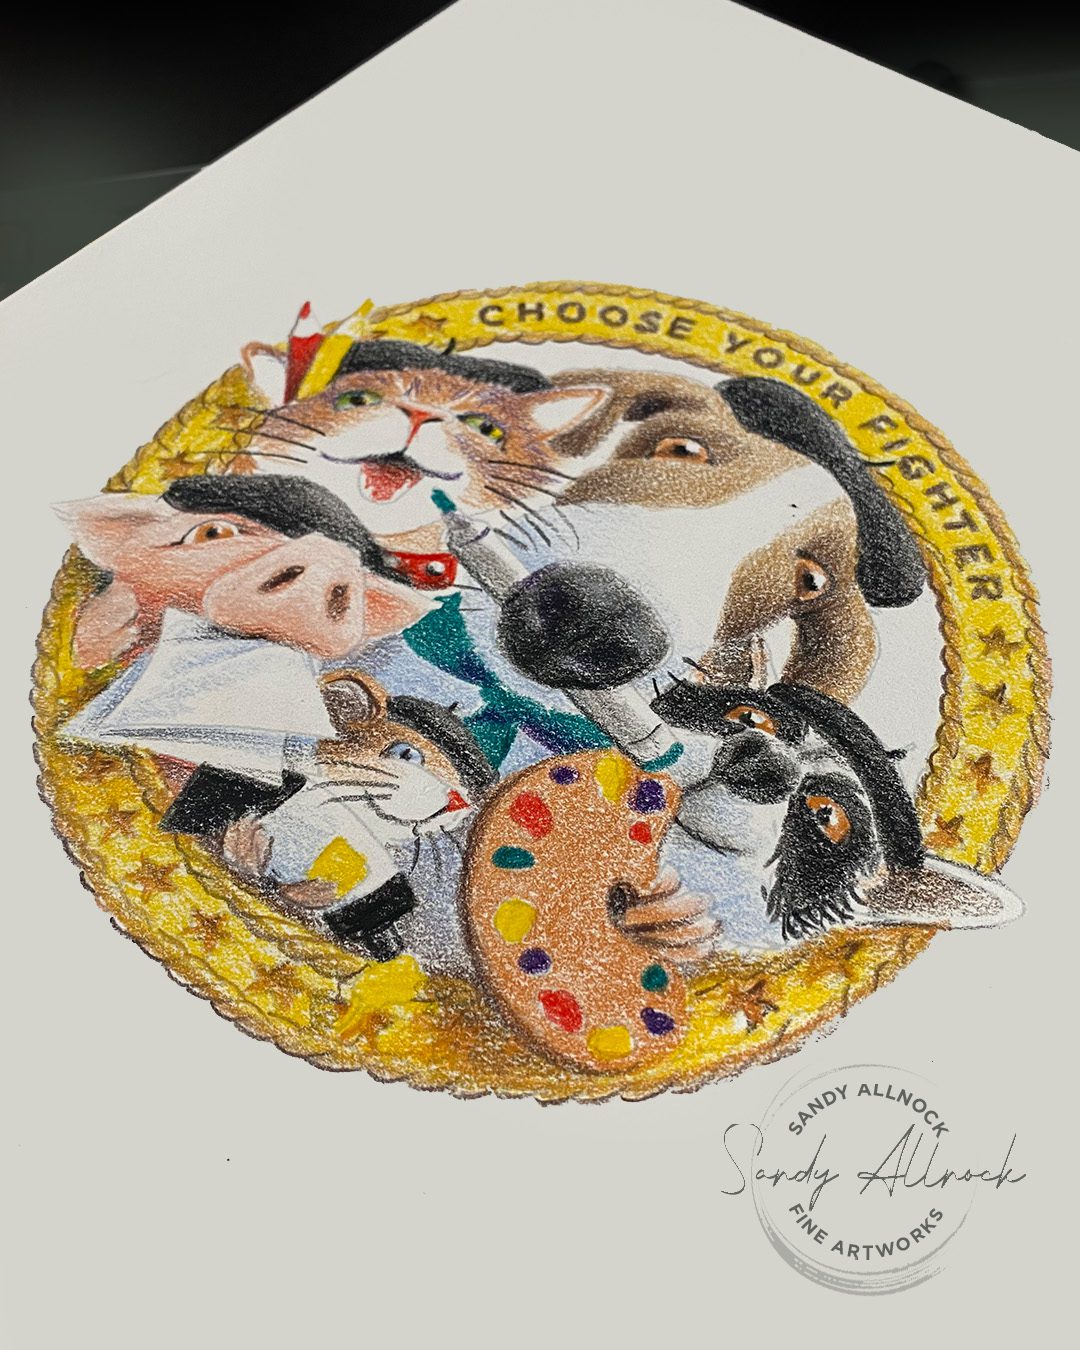
Since these pencils aren’t cheap, I decided to see what I could do with the set of 12 colors – and that way if you wanted to see what you think of them before a bigger investment, you could start with something smaller. It’s a relatively good set? I felt like I’d have preferred a medium blue rather than the lightish blue, because this one won’t darken (though light pressure lightens any color). And they had 3 browns, so I can only guess what they thought folks buying this set would be drawing with it. (Coloring books? uh no!)

I’m in progress on the 100-pencil hex chart, but one assessment I can tell you is they have far more darks than lights, likely for the aforementioned reason; if you’re not used to / or don’t like working in soft layers, try a different line of pencils. They have an exorbitant amount of blues though, and some dark greens that are going to be delicious for plant subjects. A decent range for skin tones and fur. It’s just not a “brights” line of pencils – which might tell us also why other lines of pencils are less lightfast: perhaps the darker colors are more fade-resistant by nature. I’m hoping to do more pigment research soon and figure this out.

But nonetheless, the 12 pencil set IS decent, and you can see what it does here with these critters.
Lines or implied lines?

I had some challenges with printing – not ones anyone else will have! My printer is on its very last legs, it’ll only print in the faint lines you saw on my printout. So basically everything I do right now is implied lines, though not by choice.

An attempt to take the file to print at FedEx didn’t help as their printers were down. I drove all over town til I was too exhausted to try further, and just printed it light! 

In the printable PDF, both the heavier and lighter lined versions are included, you can see which you prefer; I lost track of where my lines were since they were so faint. Which was a challenge to say the least. A sharp pencil was a MUST.
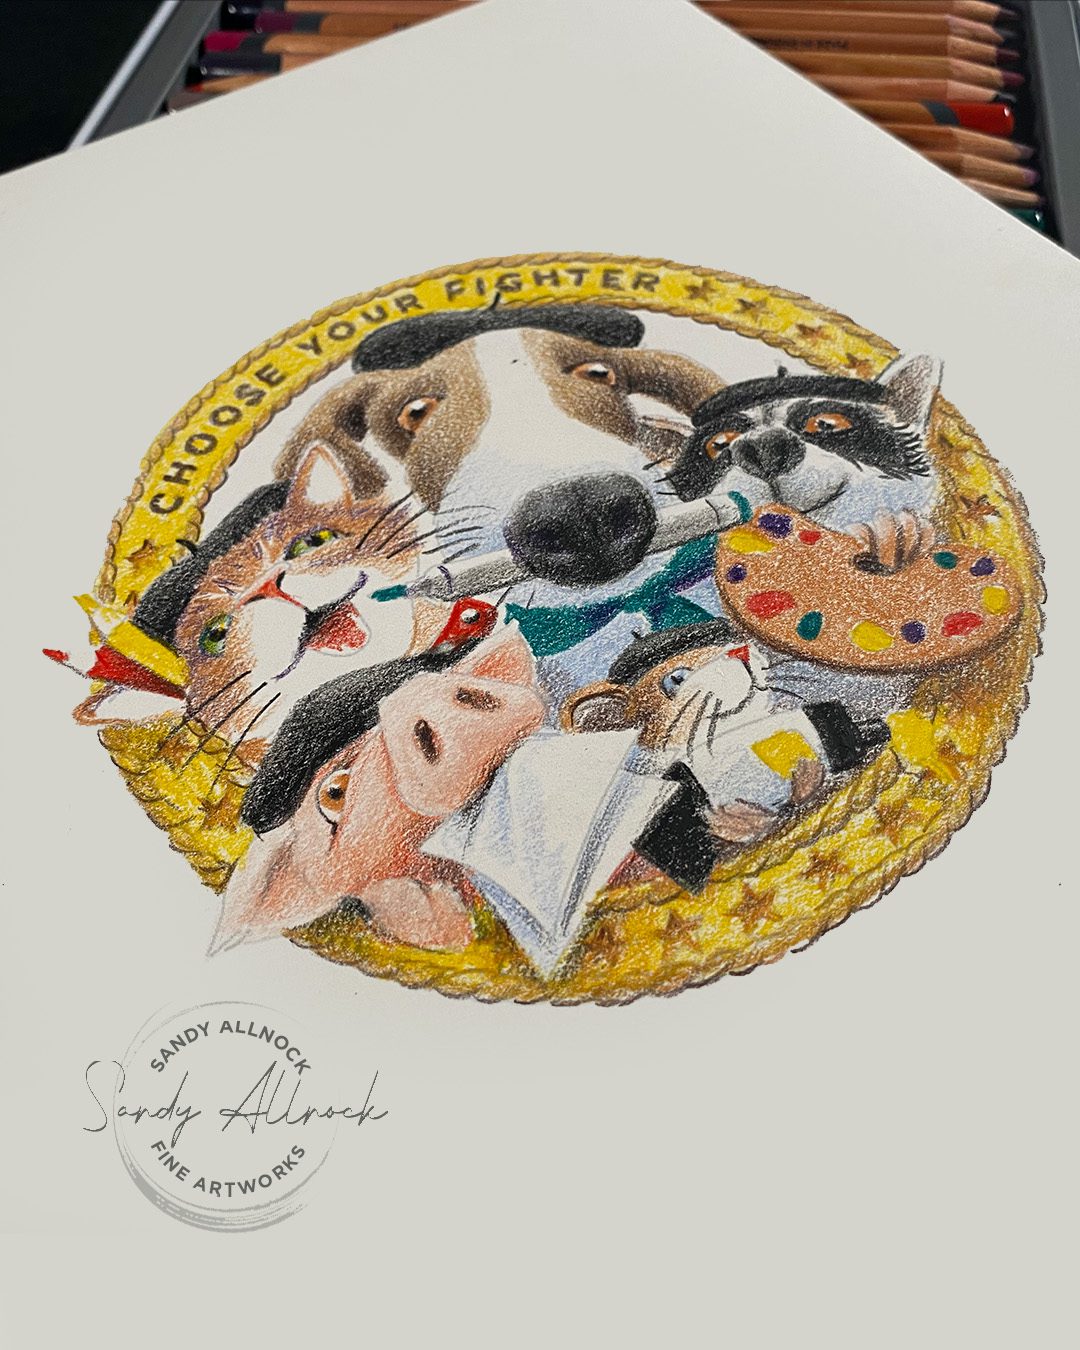
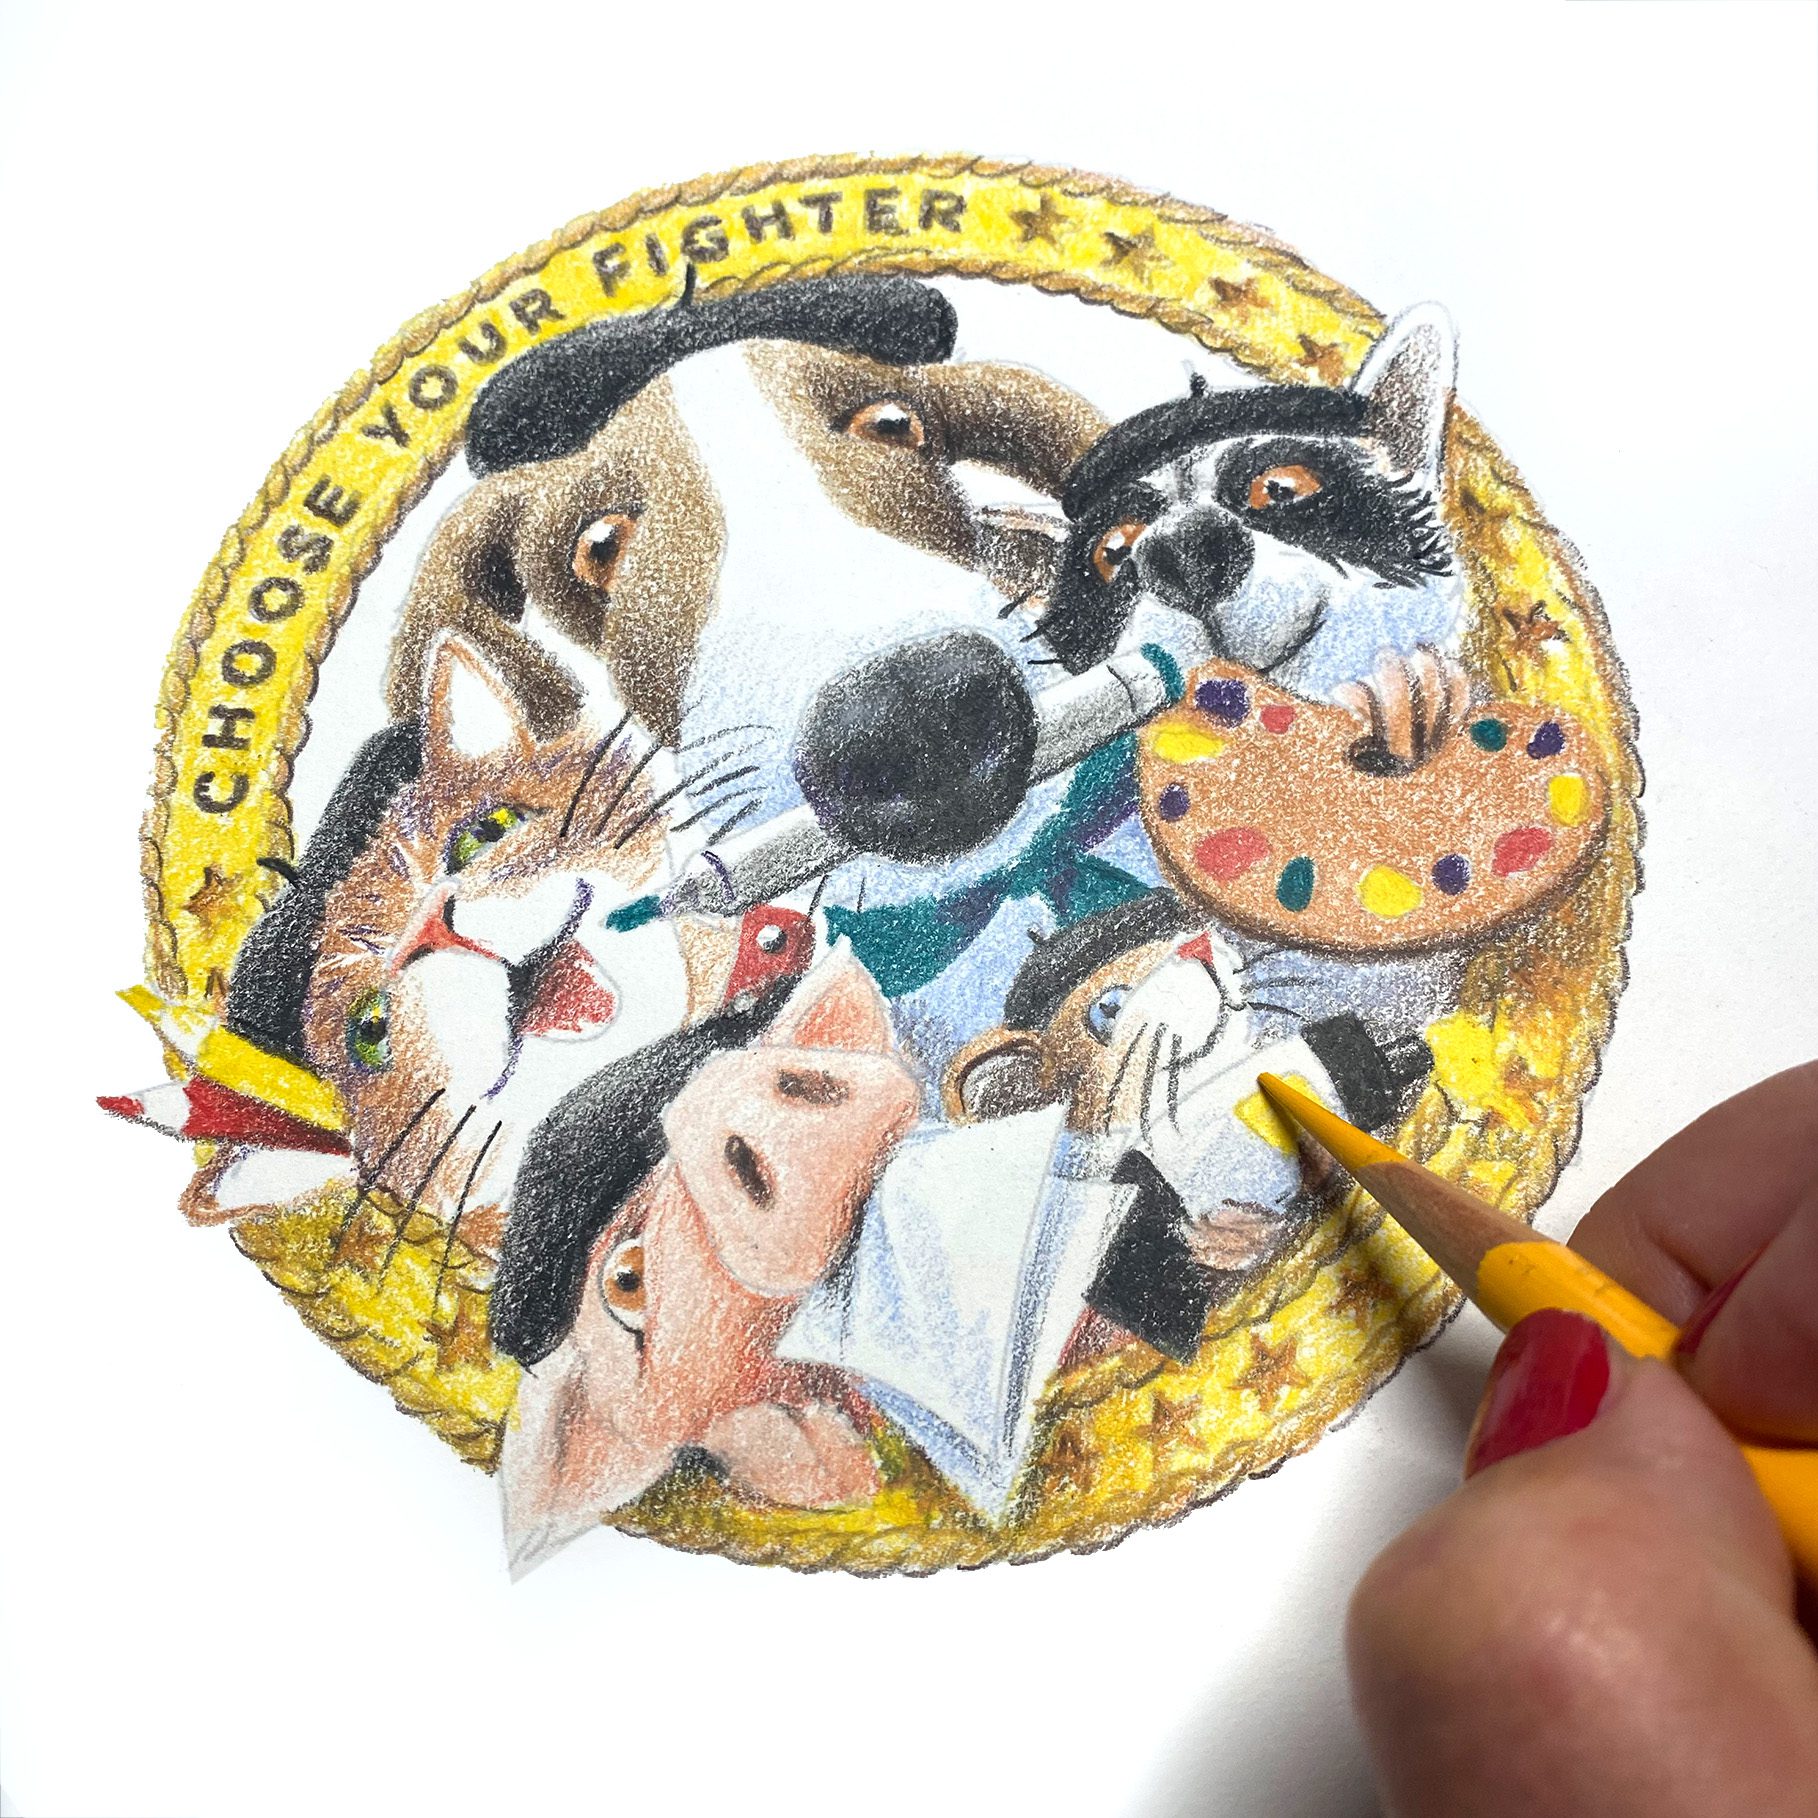
Color it yourself!

You can pick up the printable yourself – it’s a PDF with 2 versions to try as well as a resizeable JPG.

Print it on your favorite paper for whatever medium you want to use, and have fun with it. Frame it and hang it up in your workspace to remind you to choose a fighter – and get out there and save the world with your art!

How to Wash and ink: Leopard in the shade

How to Wash and ink: Leopard in the shade

I’m finally back with fresh mojo. THANK YOU for your patience with me these last few weeks since we lost my Mom! It’s been hard but the days get slightly brighter one at a time before they slip backwards again. I know it’ll be ongoing, but…I’m thrilled that I finally created something. A few somethings, even! 

My fountain pens had gone a bit unused for some time; I was busy with World Watercolor month, chased that with the partnership with Olo Markers, and my own family things. But I’ve had a class in mind I wanted to create for winter – and I needed to get the pens warmed up again.


Since my fountain pens sat around so long, I discovered I had to do some cleaning! Fortunately a quick search on YouTube using the name of the pen and “removing nib” resulted in a nice quick result that helped right away. I even took the back end apart in case that’s what was gumming things up! 

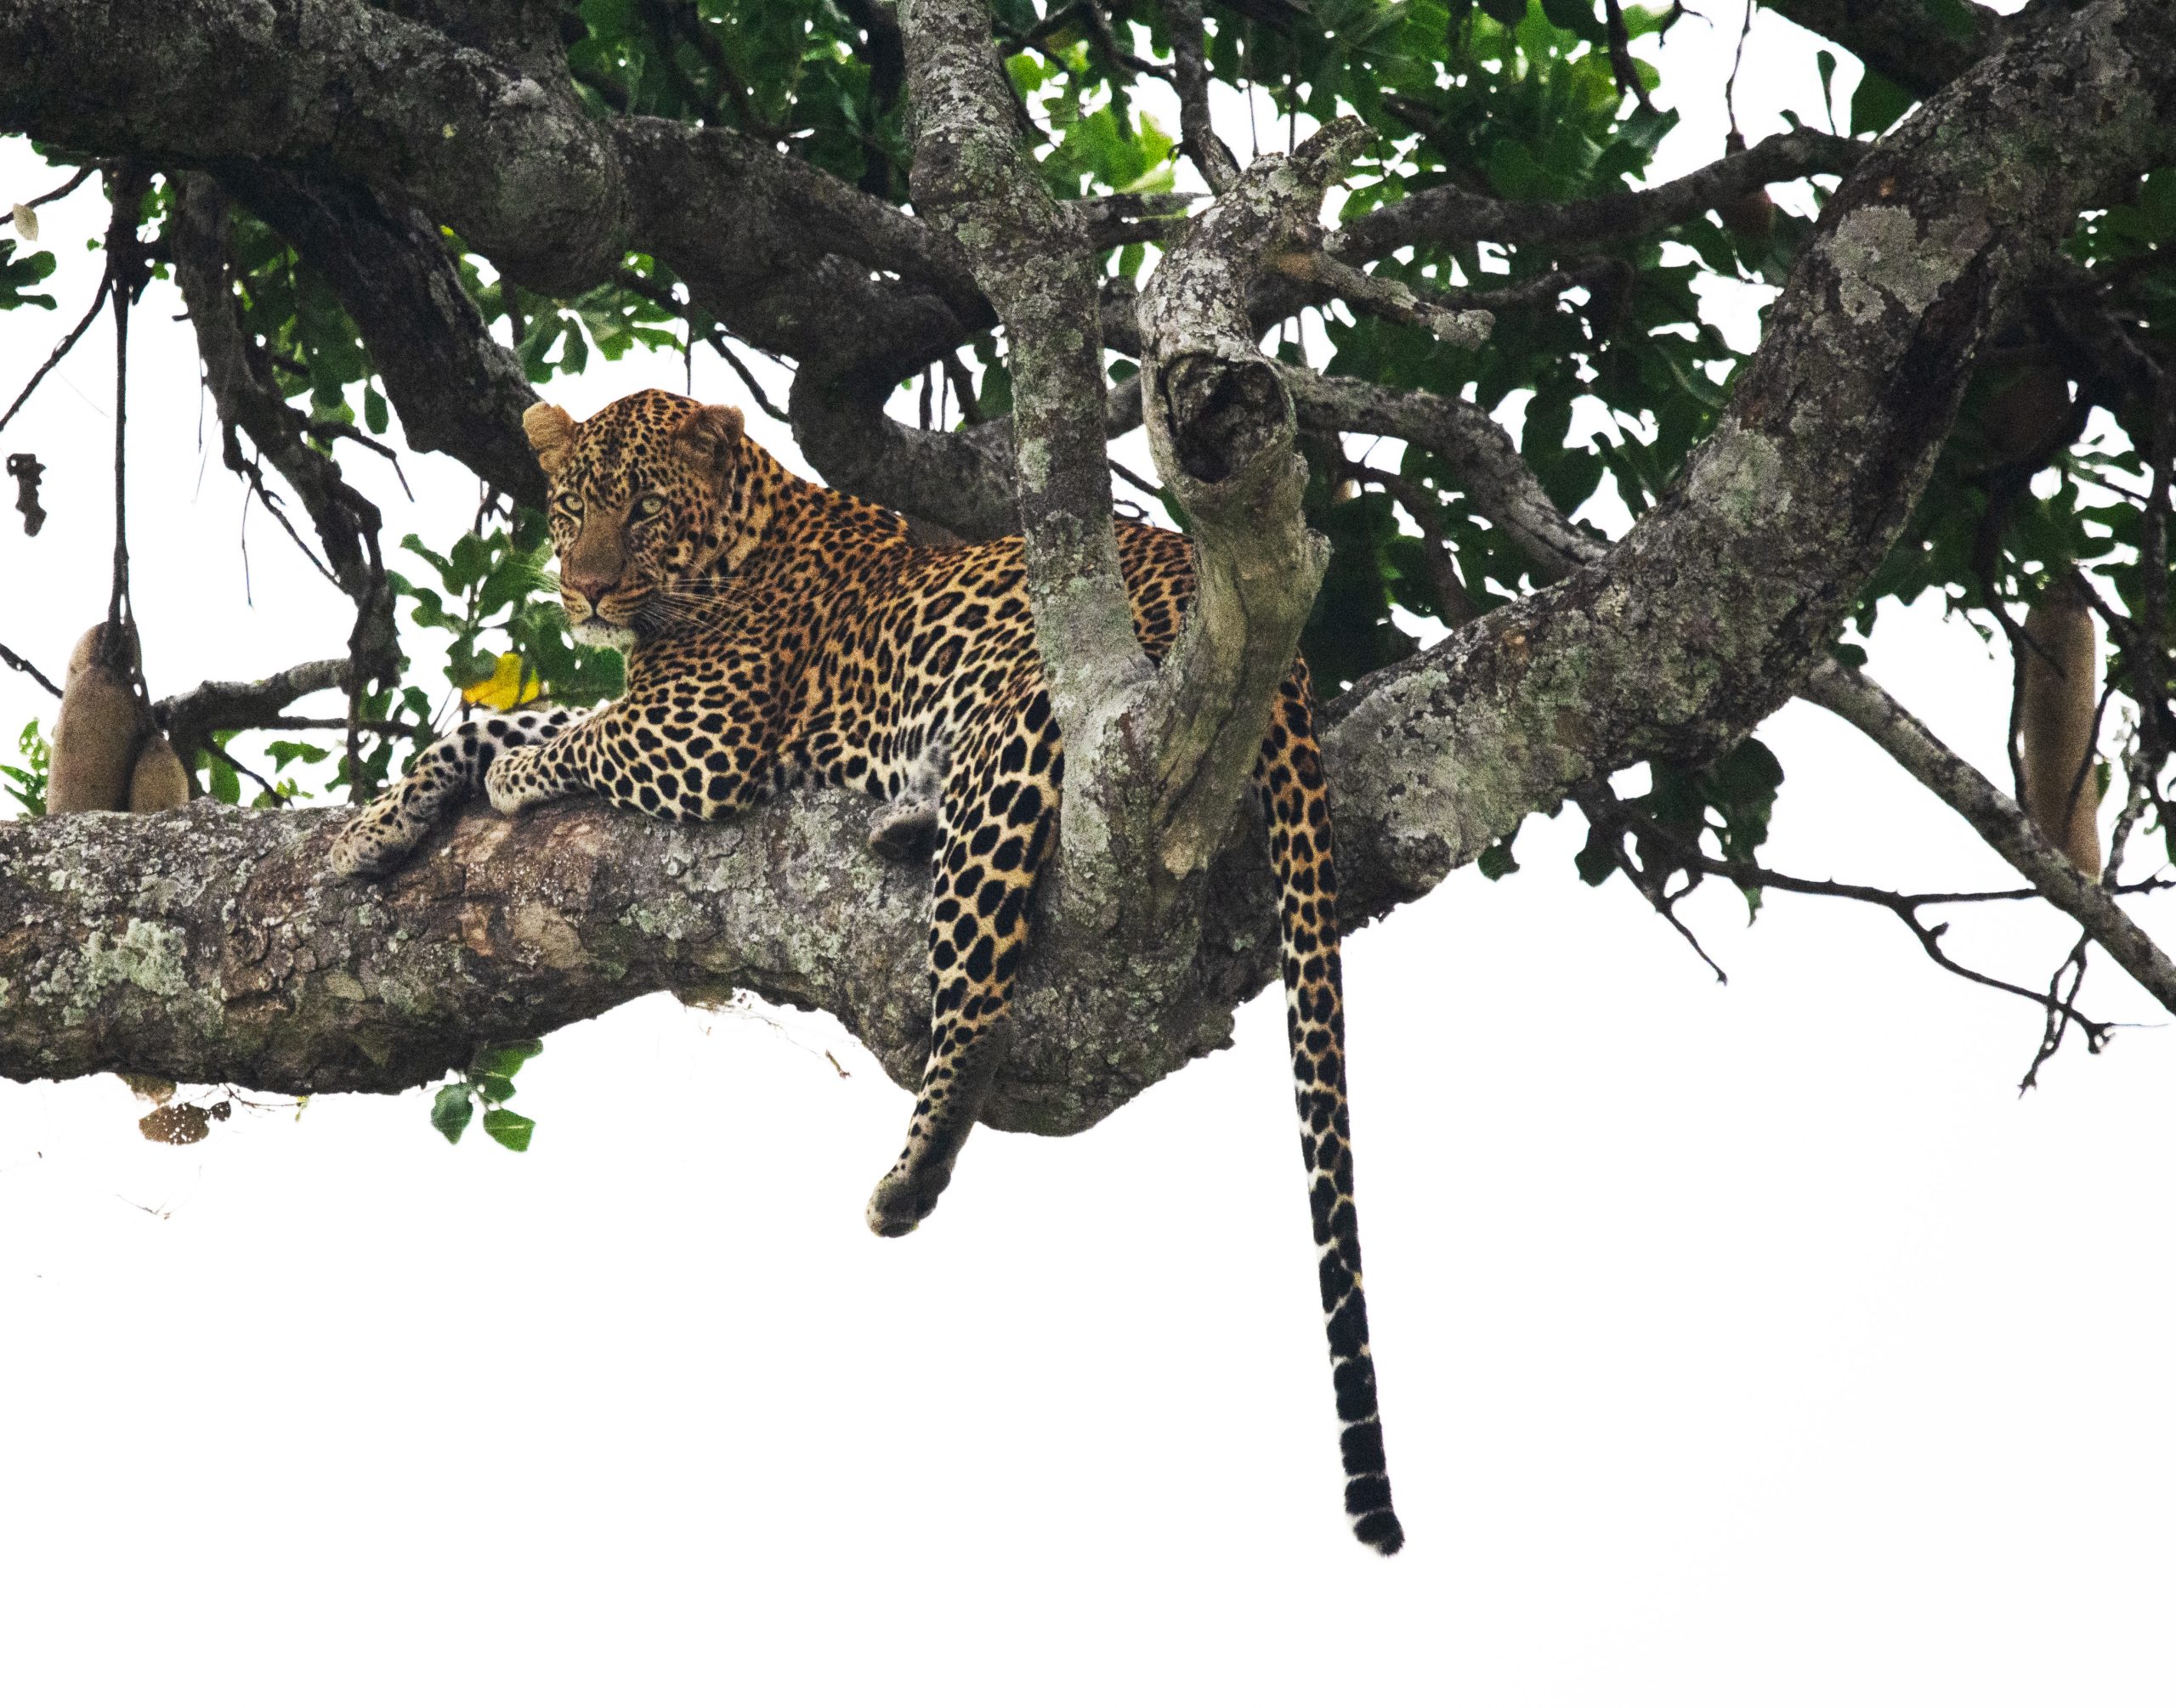
I had a course I wanted to start working on, but decided my first project after this time away needed to be something for my heart. Something Mom would have loved. And since she told me she wanted me to create more art with animals….that’s what I opted for. The photo was taken by Robert Pointer, a photographer who’s uploaded some of his work to Paint My Photo. This one was so beautiful. (His original is here.)

Video: Wash and Ink Leopard in the Shade

Watch the video below and scroll to the end to leave comments or questions — or click HERE to watch it on YouTube and leave comments over there. I read both dutifully!

SUPPLIES

Some product may be provided by manufacturers for review and use. Compensated affiliate links are here at no cost to you. I appreciate your support of my work with your purchases! Full affiliate and product disclosure | My trusted partners in art

Pen and Ink:

Fountain Pens:

  1. TWSBI Eco fountain pen Fine nib 
  2. TWSBI Eco fountain pen Medium nib 
  3. Platinum Carbon Fountain Pen Ink 

Watercolor:

Paper:

  1. Arches Bright White Rough 22×30 sheet BLICK JACKSONS

Brushes:

  1. Da Vinci Maestro Kolinsky Sable Round 10 BLICK   AMZ   JACKSONS
  2. The needle brush….a 9 or 10 are my most common sizes:
  3. Da Vinci Series 17 Maestro Inlaid Needle, Size 10 , Size 9

Daniel Smith Watercolors:

  1. Yellow Ochre BLICK  AMZ  JACKSONS
  2. New Gamboge BLICK   AMZ   JACKSONS
  3. Moonglow BLICK   AMZ   JACKSONS
  4. Chromium Green Oxide BLICK   AMZ   JACKSONS
  5. Burnt Sienna BLICK   AMZ    JACKSONS

Subscribe to receive blog posts by email:

Photo adaptations

Starting with a photo always presents an artist with a dilemma: What to adapt? How far can I stray? What would look weird?

The answers to those questions come from experience, but asking the questions about what to change is, in itself, a big step away from how can I make it look like the photograph exactly?

It takes a long time of learning to replicate to get to a place where adaptations are even possible. But as you are working through copying a photo or an art project exactly, let your mind wander. “If I could do something different, what would I want to do?” Maybe it’s beyond your skill, and that’s okay. But thinking that way will help you in choosing new projects to try; following a tutorial on that thing you can’t do might be your next step in growing. It could take a while, but it’ll move the ball forward! 

What order to draw…?

In a drawing I knew would take a few days, I made the decision to work on 1) my favorite part, then 2) the hardest part, then 3) the most satisfying. That led me to:

  1. The tree branches. I love doodling, and in a murky dark bit of wood, I can let my mind go and just doodle shapes and lines at will.
  2. The leaves. With the crazy brushstrokes to guide me, I did have to think carefully about positive and negative shapes, and at one point I was getting tired of them. But kept thinking about #3.
  3. The leopard. Rather than drawing it first, saving it for last saved the sheer satisfaction for the end. Along with a huge nuuuuddddggggeee to get it right with the pen and not much for sketch guidance.

Using the shadows and shapes in the paint as a guide for the pen and ink, I worked out some of the big cat’s shadows early on, so once I was putting in the spots, I just fit them into those sections. I could focus on the shapes, and which ones were a little more leaned one way or the other, which sections had smaller spots. Less about where to put them.

Winter Wash & Ink

If you love wash and ink, and want to make some fabulous hand-sketched cards, this class might just be for you! It takes the first Wash & Ink class and amps up the watercolor, letting the ink sing on important parts of it.

Lots of fun with tons to learn – and will help you get a jump on those Christmas cards, too!

$32.99  $29.99

Need this original?

It’s for sale! Once originals sell from my shop, I’ll add them to Fine Art America to the collection of works that you can have prints made from. 

PURCHASE ORIGINAL

How to draw on your kicks #2 (Sharpie markers)

How to draw on your kicks #2 (Sharpie markers)

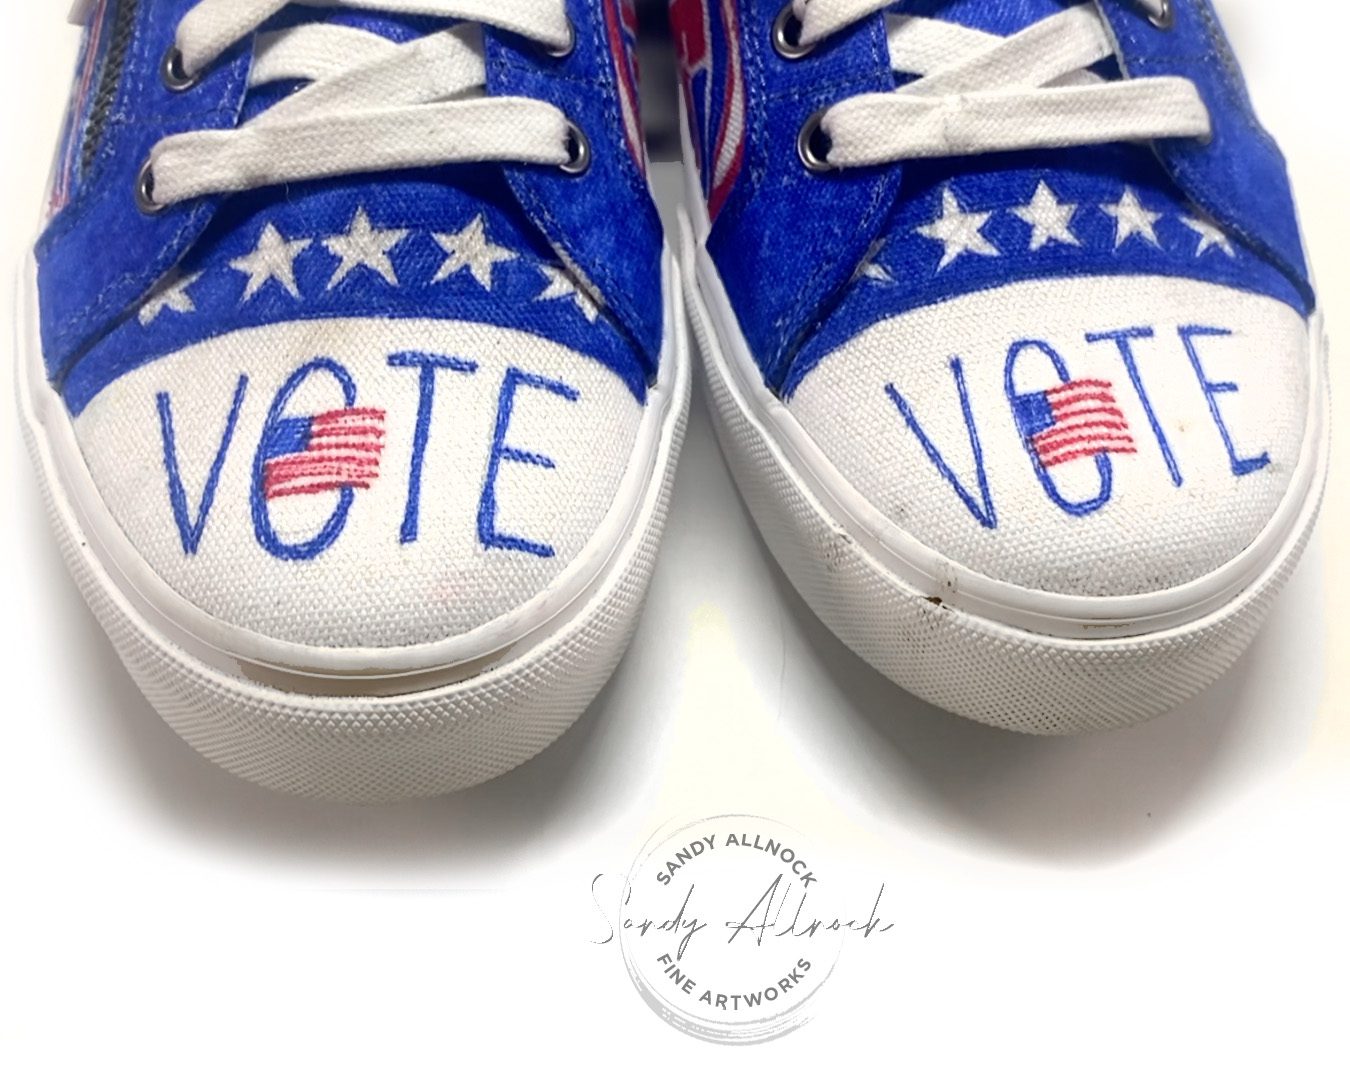
While NOT a political post….I want to warn you that I’m going to ask you if you’ve checked that you’re still registered to vote…or if you’ve registered at all! I’m a civics NERD, and believe in getting as many to vote as possible. No matter your politics, it’s important to have your voice heard.

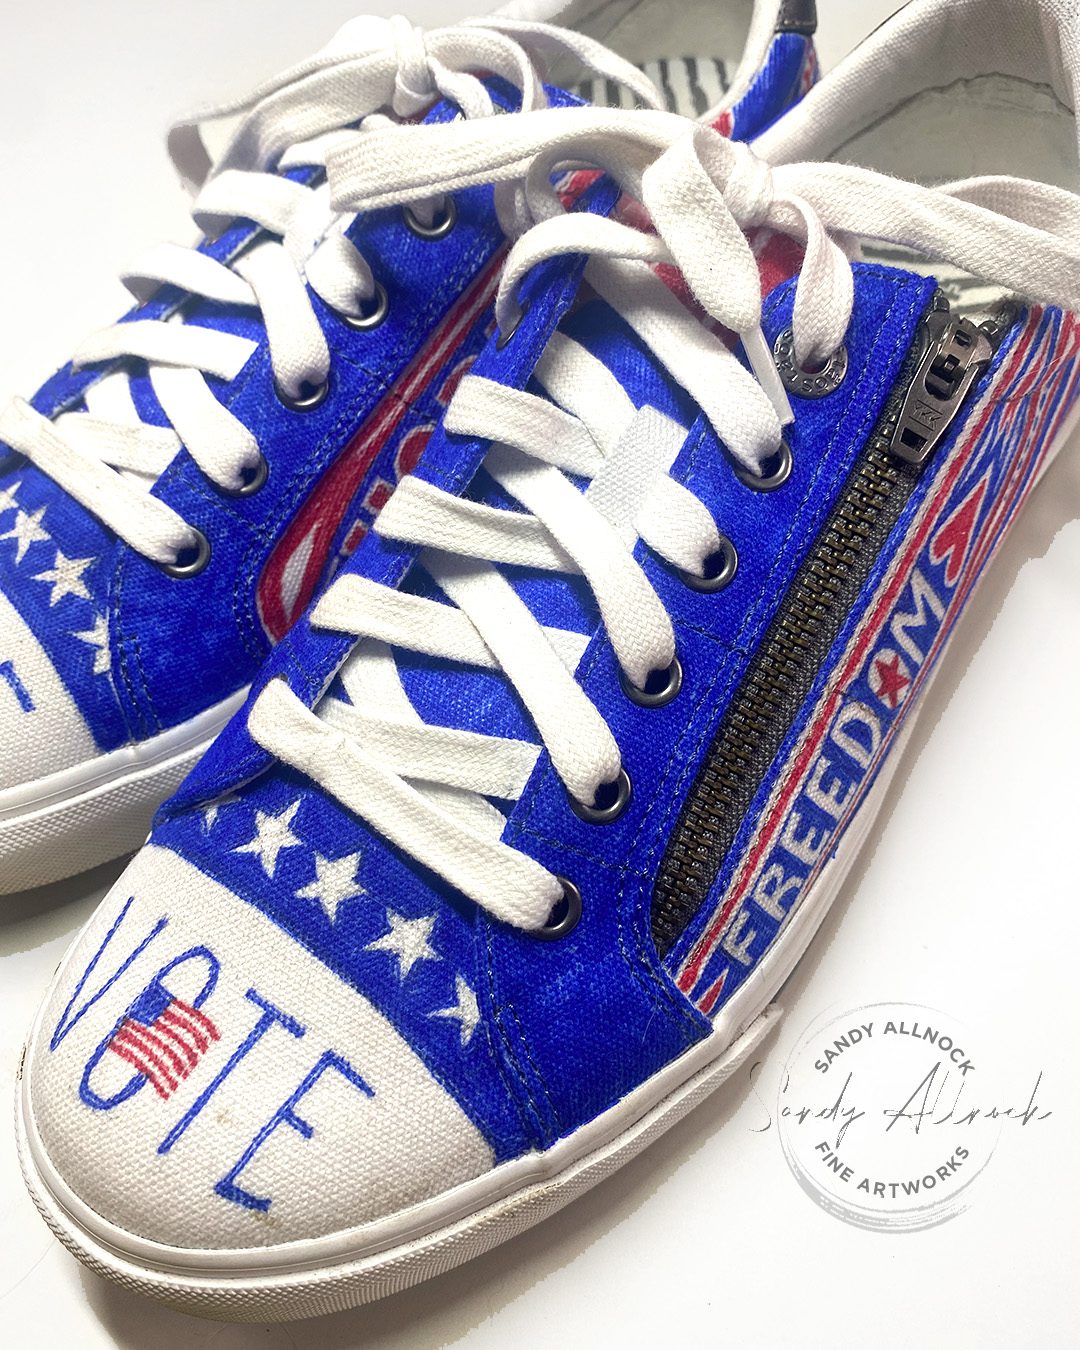
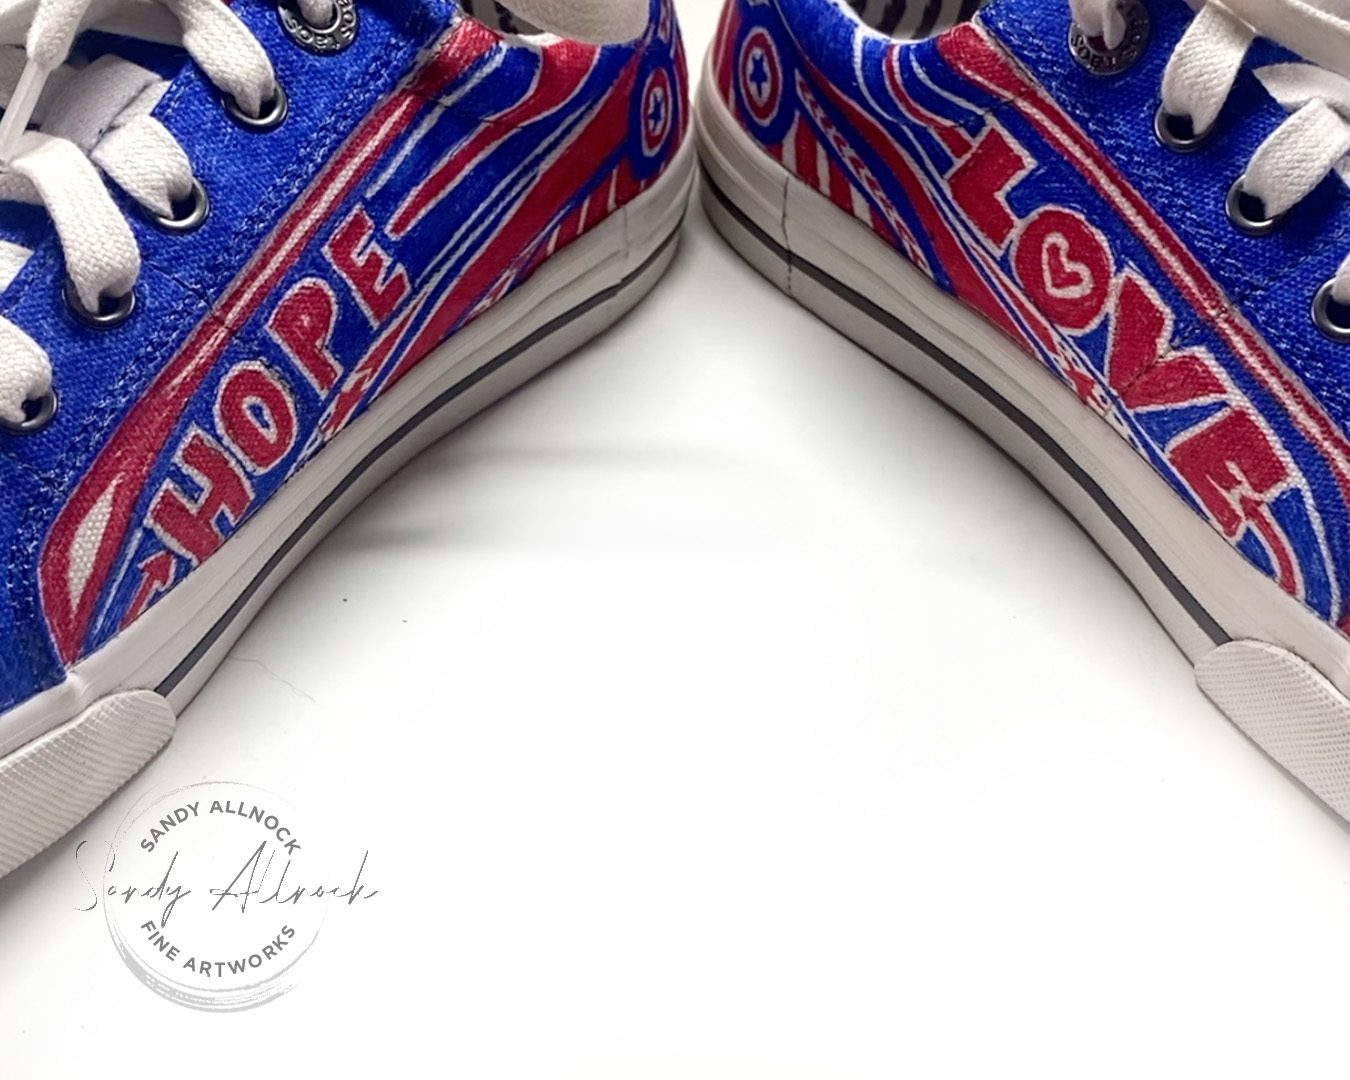
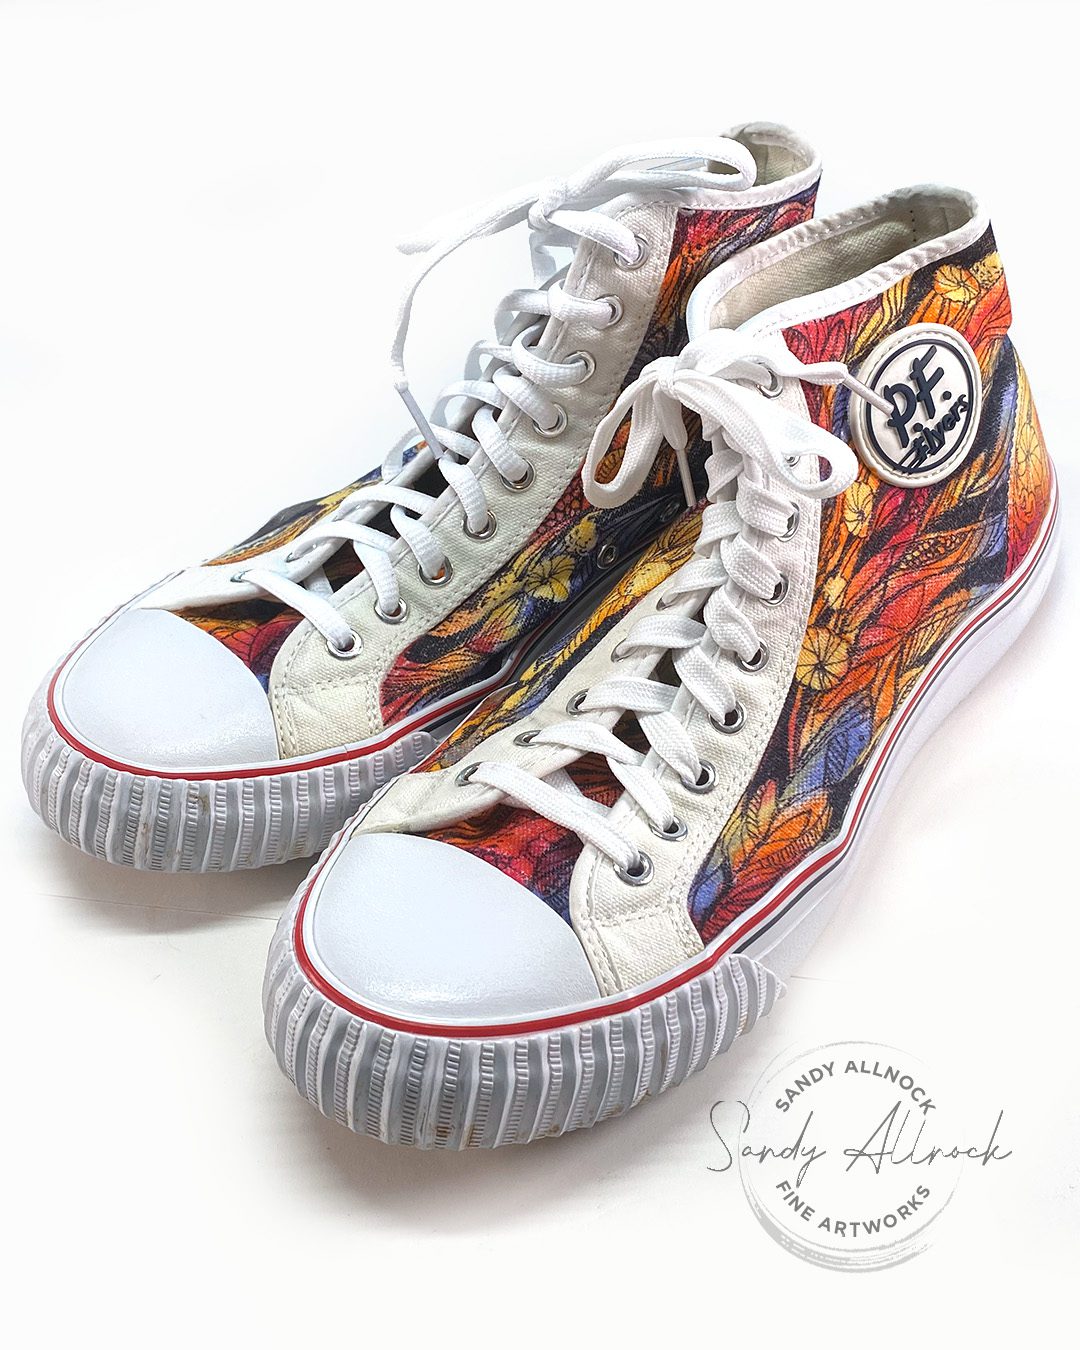
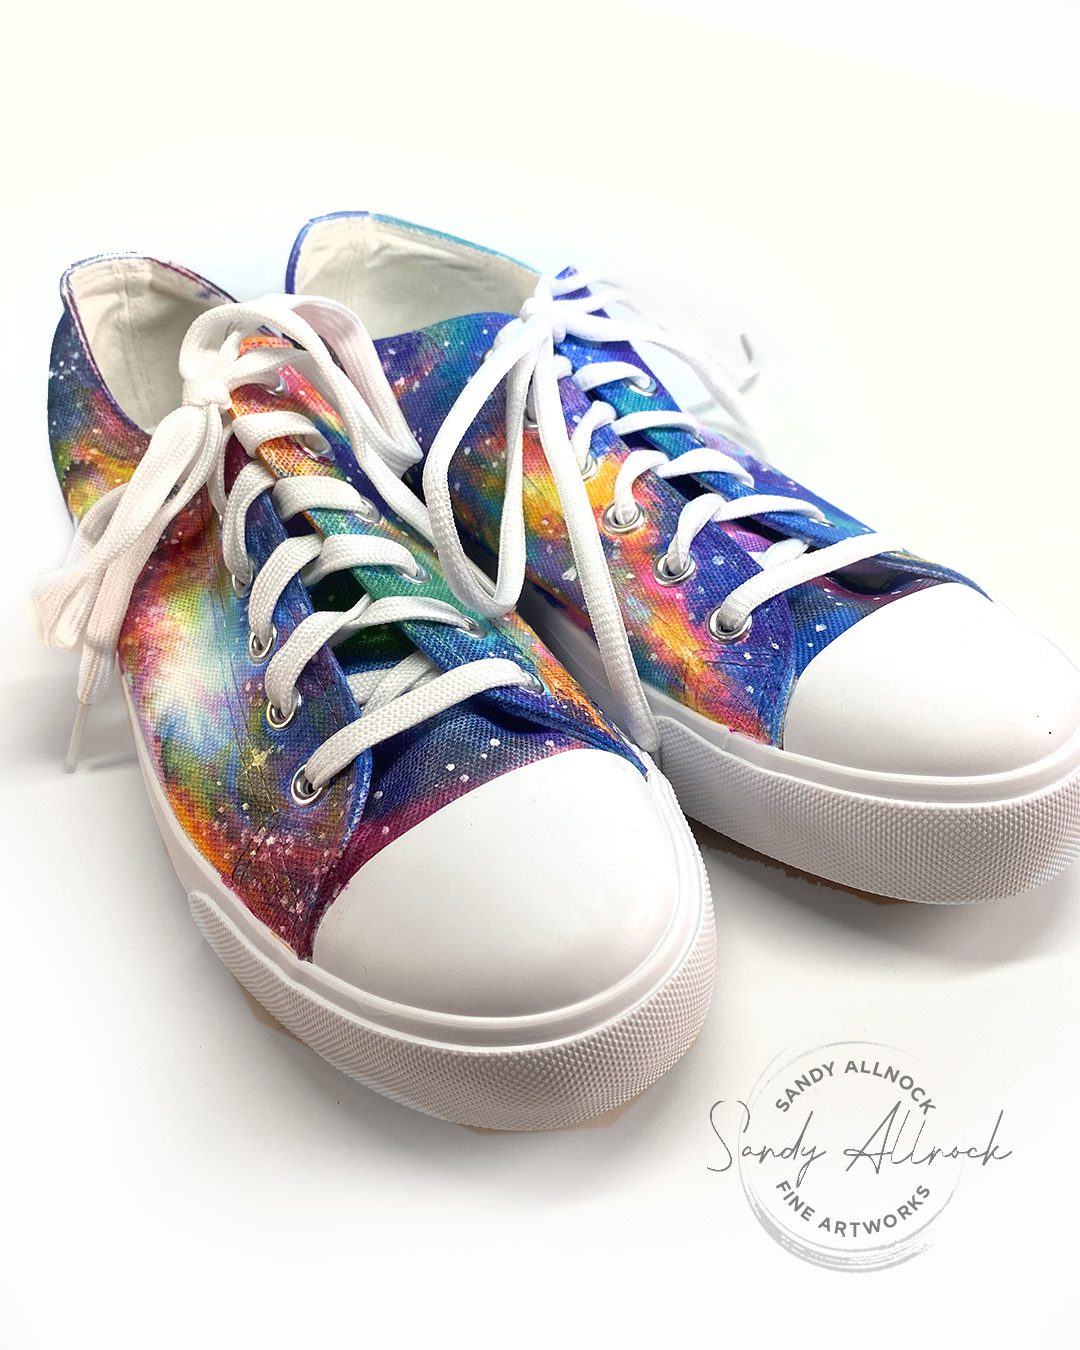
After my other pair of hand-decorated kicks getting so much attention in the last year, I thought a new pair could drive some conversation about voting, so created a new pair of kicks for myself!

Tutorial: How to draw on your kicks #2 (Sharpie markers)

Watch the video below and scroll to the end to leave comments or questions — or click HERE to watch it on YouTube and leave comments over there. I read both dutifully!

Sharpie doodling tips


Follow the stitching to keep a design flowing naturally around the shoe, or go wild over all of it1

For a calmer look, as I got with these patriotic kicks, make part of the shoe solid. Then you can maybe wear them with your fancy dress clothes. (Ha!)

I used both a thicker and thinner Sharpie – the Taos shoes have a finer canvas than the PF Flyers did, so they could handle the superfine nib, which was great! The PF flyers had a bigger canvas texture and might have been better with Sharpies.

Subscribe to receive blog posts by email:

Alcohol marker doodling

These were from round 1 when I used alcohol markers. You can see on the 2nd pair that I was able to get some soft blending with those.

Commissions, anyone?

LI’d love to do more of these but I can only wear so many. If you’d like custom kicks, pick up a pair that fit you and are comfy, decide on your theme, and hire me for a custom design!

Supplies

Some product may be provided by manufacturers for review and use. Compensated affiliate links are here at no cost to you. I appreciate your support of my work with your purchases! Full affiliate and product disclosure | My trusted partners in art

Color a Rainbow Candy Hexagon + winners!

Color a Rainbow Candy Hexagon + winners!

First let me say a hearfelt thank you for all your kind thoughts and prayers in light of my mother’s passing. I am truly humbled and overwhelmed by all the love. Bless you all.

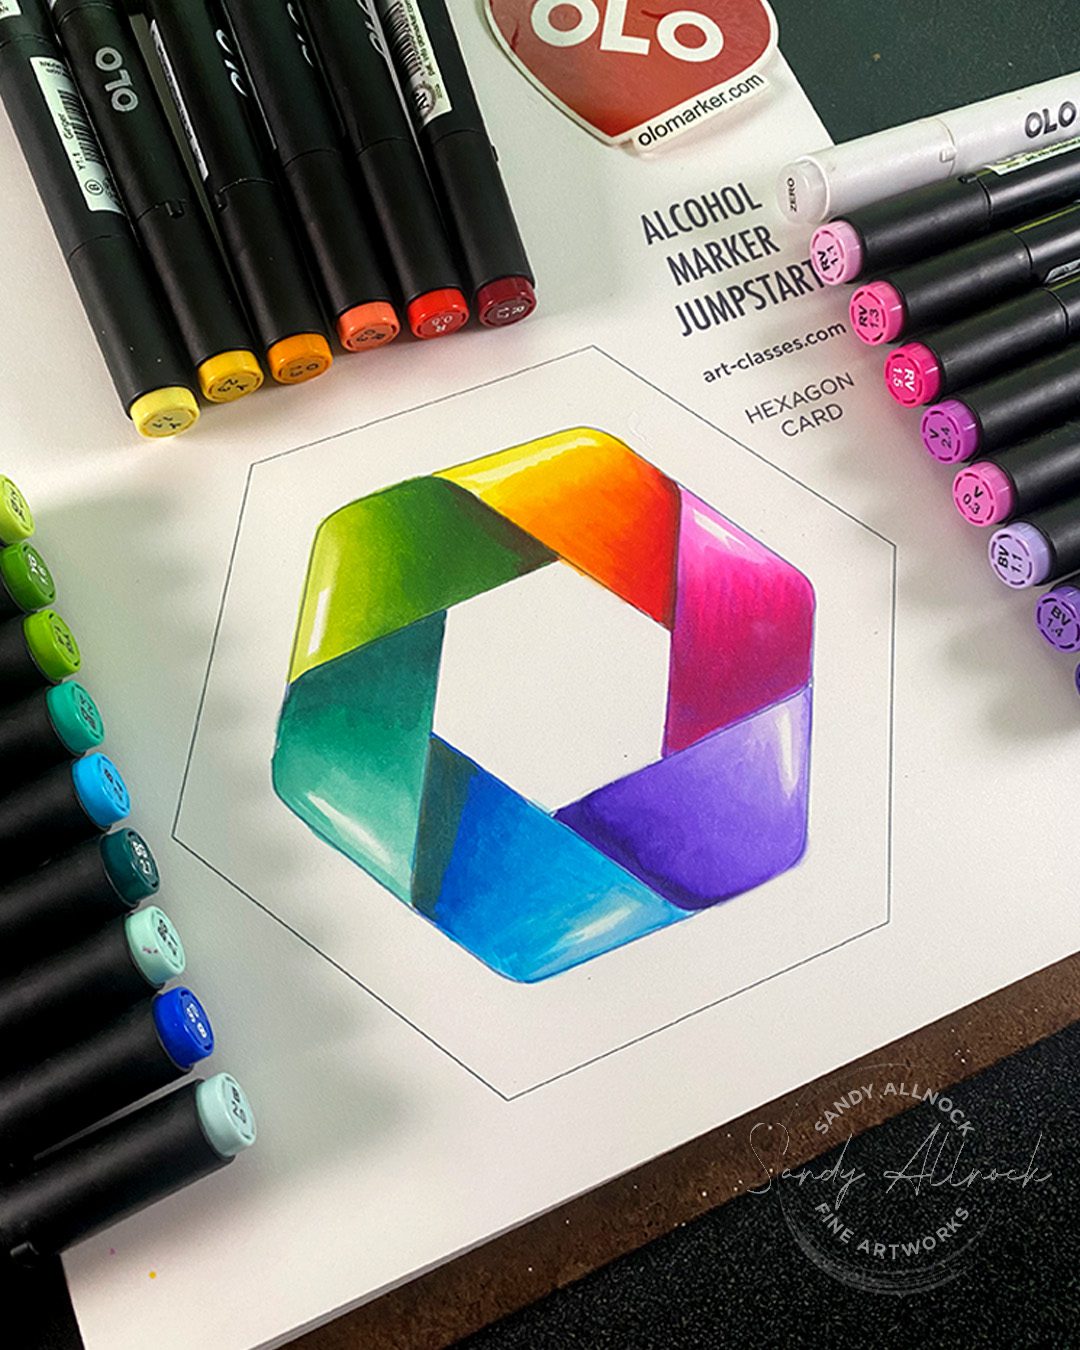
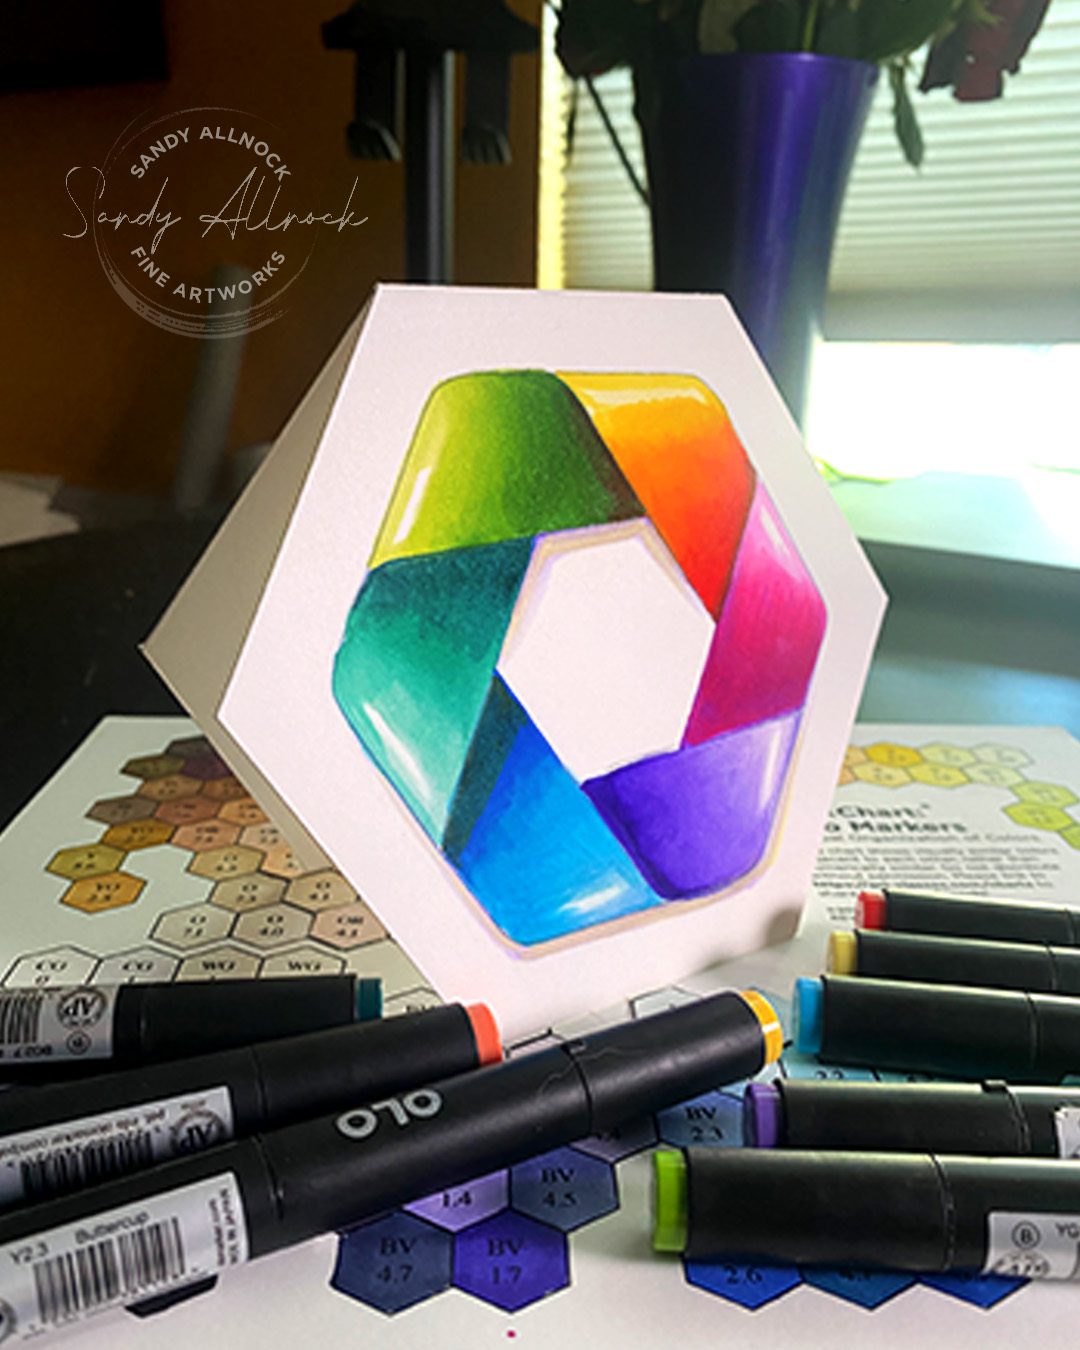
In my quest to spruce up one of my oldest courses, I found something fun! In one lesson on shading, we color a swatch practice sheet of a graphic similar to this….but I really wanted to see it as a card. So now it is!

Tutorial: Color a Rainbow Candy Hexagon

Watch the video below and scroll to the end to leave comments or questions — or click HERE to watch it on YouTube and leave comments over there. I read both dutifully!

Want to color one?

Three ways….

  1. If you’re already a student in the class, just log in and scroll to the final bonus lesson, and you’ll find it there. 
  2. If you aren’t a student, how about signing up? It’s on sale!
  3. And if you’re not a marker user and would like to color this up in pencils or another medium, you can pick one up here!


Subscribe to receive blog posts by email:

Winners of classes!

Random.org helped me pick winners – it took me time to go make sure everyone did all the things….but let’s see who was selected!

First: four winners of one of these two courses! Email and let me know which of the two courses below you’d like and I’ll add it to  your account!

  1. Bettina Kelson
  2. Janet Trapp
  3. Lucinda Hughes
  4. Karen Bean

If you didn’t win, I have good news for you too – I extended the sale price. So if you were waiting to see if you won first, you didn’t miss out on the discount. 🙂

Winner of OLO gift certificate!

Drumroll please….the winner is lisa.newman.560 !!! Please email me and I’ll connect you with the good people at Olo. 🙂

This month at Artventure

If you haven’t joined Artventure, what’s holding you back? This month I’ll be creating some art in alcohol markers that won’t be elsewhere. Some stamped, some sketched, who knows what’s comin. Might use some other mediums, depending on what the daily prompts below inspires. Pop in, share your work, cheer on others. Let’s build some community!

Snacks, anyone?

This is an older pic of me – I lost my sunglasses (prescription!) and  haven’t been able to justify paying for another pair since then. But – the ice cream is the important thing here!

I created a new page on Art-Classes for ARTVENTURE SNACKS! A number of you just aren’t game for joining our community (you’re missing out!)….but I don’t want you to miss out on the learning TOO. So I’ve made copies of some of the courses on Artventure over at Art-classes. That means you can try out a very small/short/inexpensive snack of a course, to see if that shows you a bigger course is calling your name too! Head over to the snacks page!

 (It’s in the menu bar, but you can also click on the link in the purple bar at the bottom.)


Supplies

Some product may be provided by manufacturers for review and use. Compensated affiliate links are here at no cost to you. I appreciate your support of my work with your purchases! Full affiliate and product disclosure | My trusted partners in art

Derwent Lightfast Pencils: First Impressions (and news)

Derwent Lightfast Pencils: First Impressions (and news)

I have sad news to share, and since I knew it would be coming at some point….some art to share in honor of that news.

My Mom passed away just over a week ago. 🙁

She had been ill for quite some time; regular readers will know that I spent a couple weeks with her this spring (blessedly I spent my 60th birthday having cake and ice cream with her!). We knew it was close to saying goodbye, and frankly we all did say goodbye when finally returning to our homes. 

Mom did rally for a while, and even was out of hospice for a short time. She tried to get around on her own, and she’s such a determined fighter she wanted to get out to the dining room to visit with her friends. Even small outings were hard for  her but she was feisty til the end!

Eventually she had a series of possible strokes, followed by a number of falls. Until the last one she hadn’t gotten hurt, but that last one….well, we knew it was likely to get the best of her.

When I was visiting, we’d decided not to make another emergency trip like that one; we’d said our goodbyes. I’m grateful we made that choice back then; while it entered my mind to book a flight, I remembered that decision and just took deep breaths, waiting for the call. Mom’s last days were spent sedated, so we wouldn’t have been able to talk or visit, and she passed peacefully in her sleep.

It’s been just over a week now; I waited til now to post this because, well, it’s hard. My heart is broken. 

In another fortunate thing, I planned ahead; I had this and several other videos “in the queue” awaiting this time. So this and the next few videos were created this summer so I could take some time in quiet and peace to grieve. 

Please feel free to leave comments on this post or social media, but refrain from emailing; I’d like to keep that clear for family emails as much as possible for a bit.

Tutorial: Derwent Lightfast Pencils: First Impressions 

Watch the video below and scroll to the end to leave comments or questions — or click HERE to watch it on YouTube and leave comments over there. I read both dutifully!

Derwent Lightfast Colored Pencils: first impressions

After owning so many great colored pencils, I wasn’t expecting another brand to get me excited, But as I started making this first drawing, and realizing I could just layer til the cows came home – I was in love. They are delicious.

These have the highest lightfast rating among the Derwent family, and I’m also excited about that. Nothing like thinking about an art piece slowly disappearing from the wall!

I’ll be swatching them and working on a hex chart soon, so if you have friends who own these let them know to follow along and keep an eye open for it.

Notes from my friend Helen Carter

She’s a wonderful artist, be sure to pop over to her website and also go follow her on Instagram – tell her I sent you. These are her quick answers when I just asked which of the Derwent pencils do what, since I know they wouldn’t have all these if they didn’t perform differently.

Lightfast are the top tier product. Every pencil is highest level lightfast and won’t fade. The colour payout is huge. Medium soft core, holds a point well. Not prone to bearking. Not scratchy. 100 colours in the range.

Procolour. Hard core. Excellent quality. Need to work with them sharp for best results. Colours scan well. Great for details. Not my favourite as they are best used with lots of light layers…and I mean lots!

Coloursoft. Very soft, almost chalky feel. Wonderful on textured papers. Lovely for portraits or blended things. Not all lightfast. 72 in the range *I think from memory

Chromaflow, newest product. Mid to low price for quality pencil. 150 in the range. Not all lightfast. Thinner barrel design. Softer core. Super vibrant colour choices. A superb pencil for colourist. Very blendable. Sometimes a bit breaky because of the soft core

Derwent Drawing. Super thick, sometimes a bit sticky, but delicious and wonderful. Soft core. I don’t use them nearly enough! Not so many in this range. Very natural tones. Great for landscapes.

Mom’s advice 

My Mom, feisty as she was, never gave up. She went back to college after her 3 girls were gone from home, and got her art degree at age 71! And when I asked her last year for her advice, she just kept talking about the importance of learning. To keep learning is to stay young and interested in life. 

Below is a photo of her after winning first prize in an art contest at age 93! Her painting was printed by the coroporation that owns her assisted living as their Christmas card.

Subscribe to receive blog posts by email:

In honor of Mom

Many thanks to those who’ve comforted me this last week on Patreon, Artventure, and even Threads. The first two are my “tribe” of close art pals, so I did tell them what was going on; the third is where very few people have a clue who I am, so I felt okay sharing there just to be able to throw thoughts out into the universe.

And thanks to those who’ve sent flowers – my house looks like a funeral parlor, and it smells lovely. To friends who brought food and hugs, thank you too. And to my pups who’ve helped me cry….I love you two.

If you’re inclined  to do anything in my Mom’s honor – don’t send flowers…..make some art. That’s what she would want. Sign up for an art class, in person or online – she would tell you to sign up for a class with me but I’ll be content for everyone to go carry on Mom’s legacy.  

The plan

I have a number of videos already planned, and a dwindling number of social posts that will fill in between them; I’ll be back in a bit with fresh mojo. But I’d like to take some time. I’d appreciate comments left here and social media rather than email so at least email can be reserved for family plans. Thanks.

Supplies

Some product may be provided by manufacturers for review and use. Compensated affiliate links are here at no cost to you. I appreciate your support of my work with your purchases! Full affiliate and product disclosure | My trusted partners in art

  1. Derwent Lightfast Colored Pencils BLICK – AMZ – JACKSONS – DERWENT
  2. Clairefontaine Palette No 7 warms 7×9 pad AMZ –  JACKSONS 
  3. Ampersand Hardbord Panel 9×12 BLICK – AMZ
  4. ProConsole Artist tape 1/2”  AMZ